


What Is Private Mortgage Insurance (PMI) and How Does It Work?
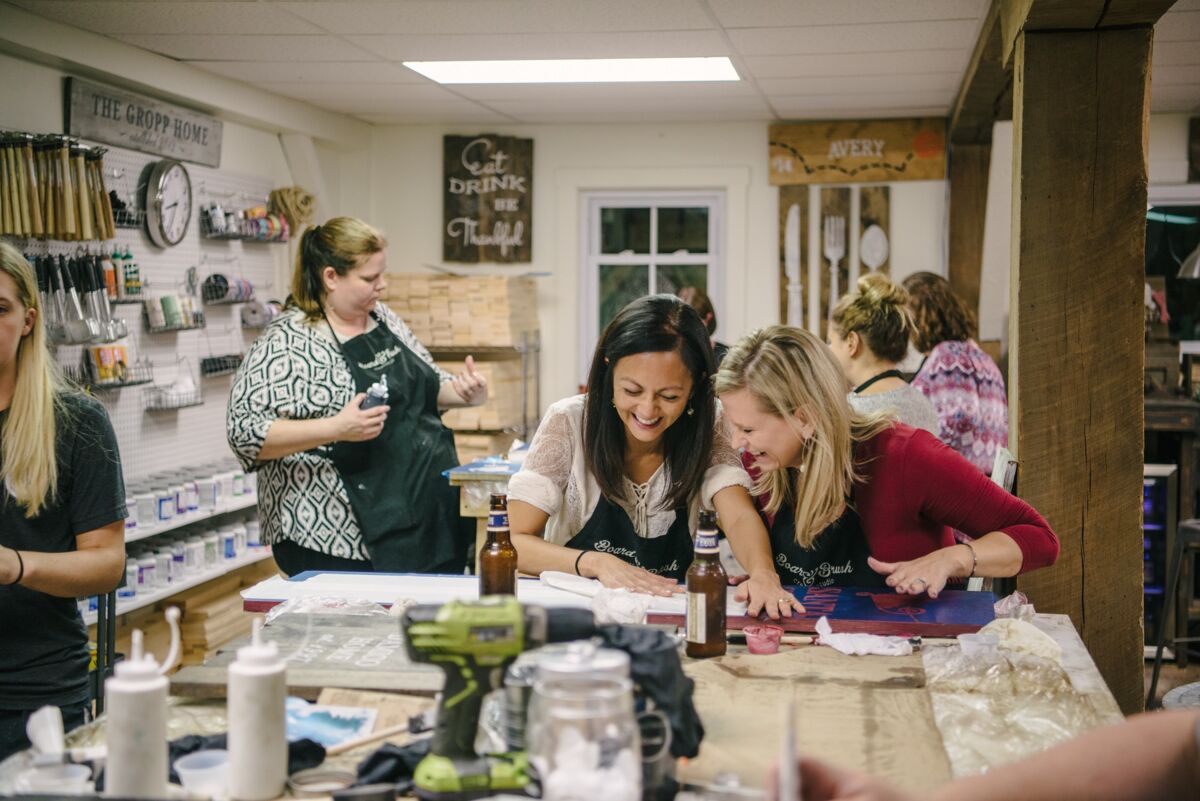
We all love decorating our homes to give us that warm and fuzzy home feeling. But, have you gone out to look for decorations at a name-brand store that are just so expensive and thought, I could probably make that!
Skip the overpriced décor and craft your own accent pieces to give your home a more personal feel. Well, I have put together a few affordable and easy DIY projects for you to do at home that look store bought.
For this DIY home décor blog, you can use household items you already have or find a few miscellaneous supplies at your local craft stores. My local craft stores are Michaels and JOANN Fabric and Craft. Don’t forget to bring those coupons!
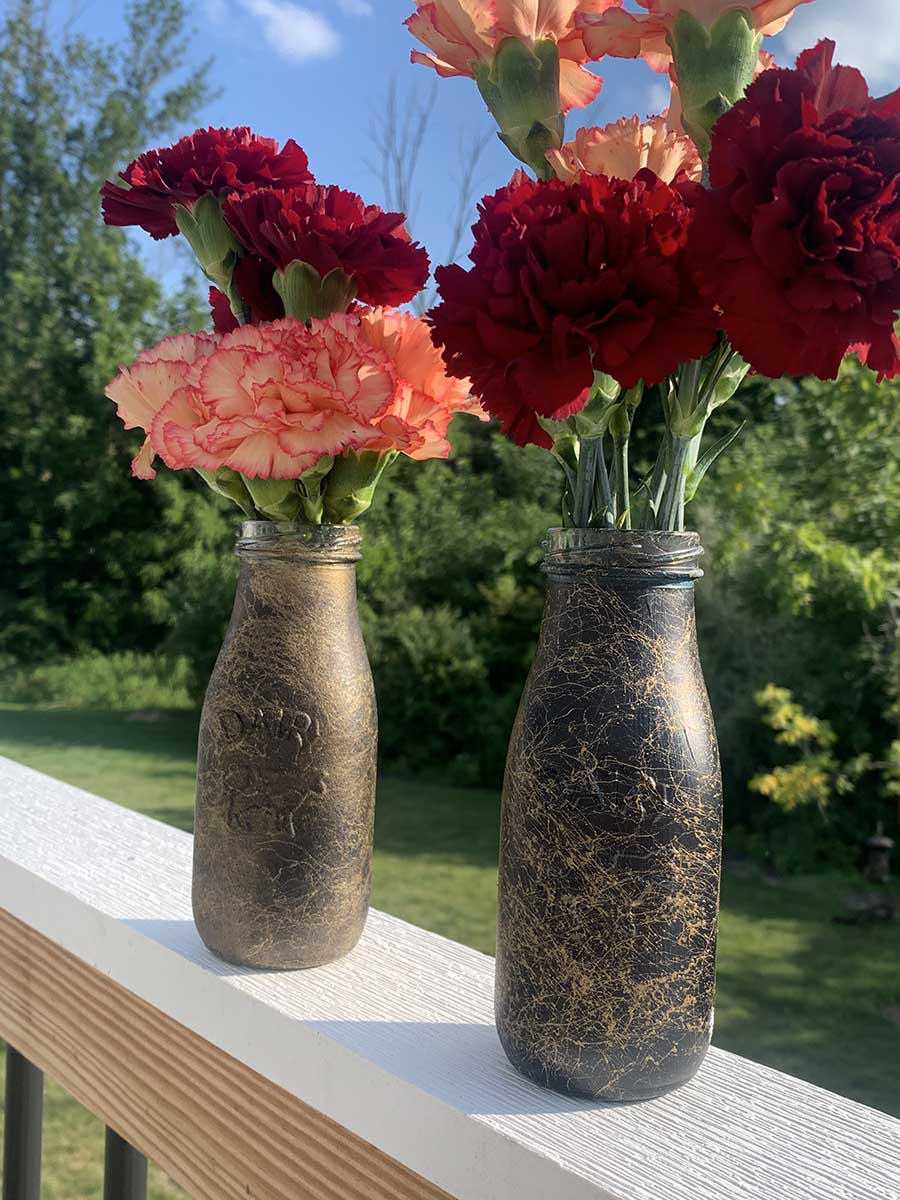
This project is great for centerpieces or fresh flowers around the house. Choose paint colors that match your other décor and some cheery flowers for a pop of color in any room!
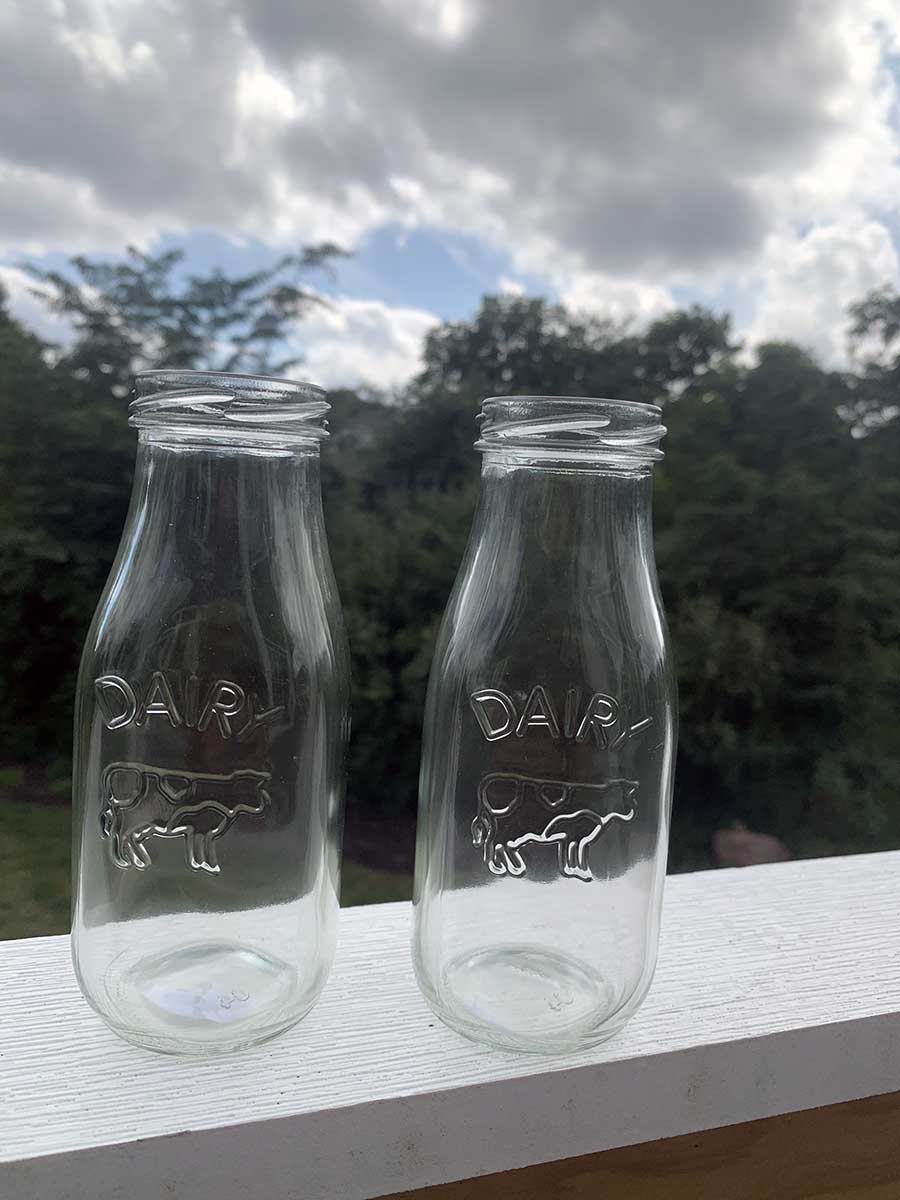
For this DIY rustic milk jar flower vase, you will need:
Once you have all your supplies brought together it’s time to start decorating! I first start with coating the two jars one with black the other with gold. I covered the jars completely and let them dry for a few minutes. Once the two jars are dry, I started marbling the different colors on top of one another, giving it the two-toned color effect!
Once this is complete, take sandpaper to sand the paint off the lettering and symbol of the milk jar. To give it the all-around rustic finish for your farmhouse look, you can sand other parts of the jar, too. To add the finishing touches you can tie a ribbon around the top of the jar and add flowers.
You have now created your first DIY home décor project! That wasn’t so bad!
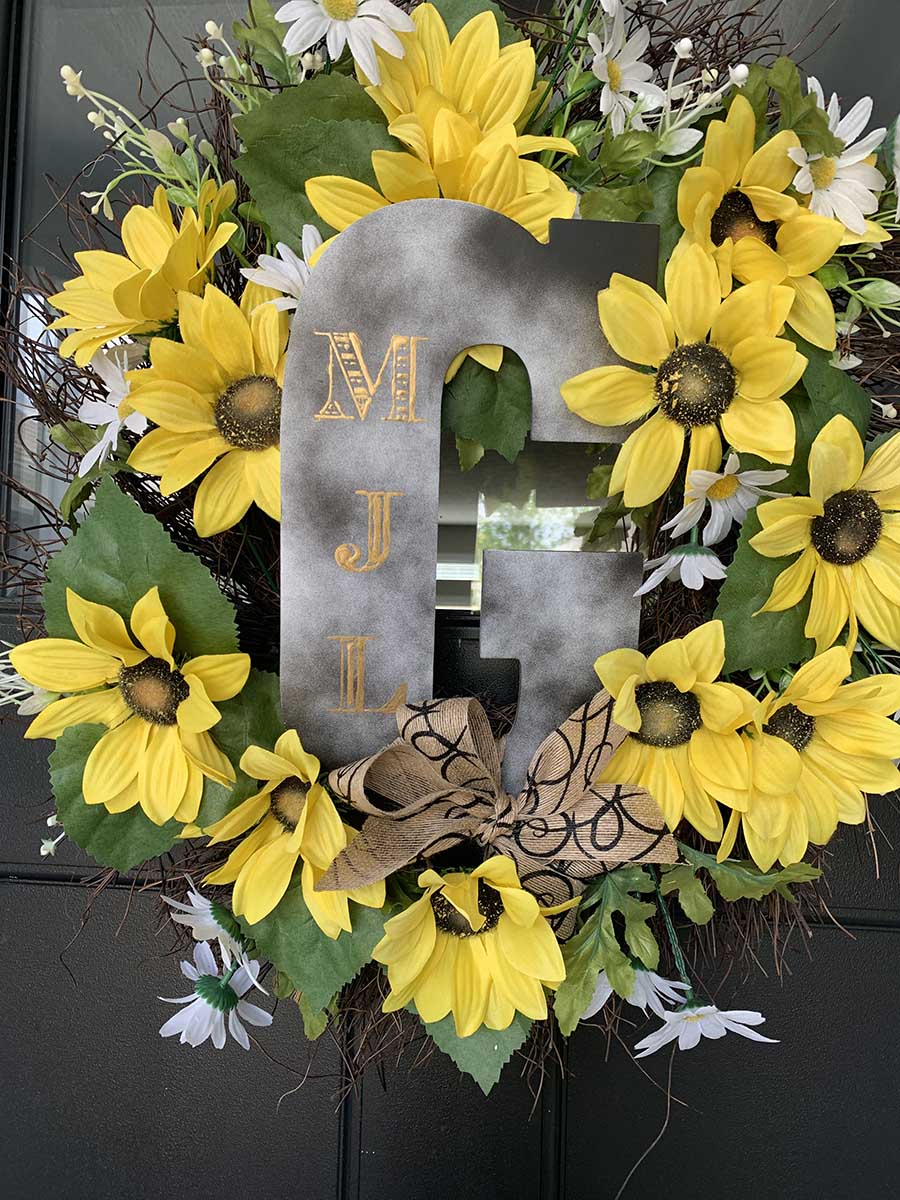
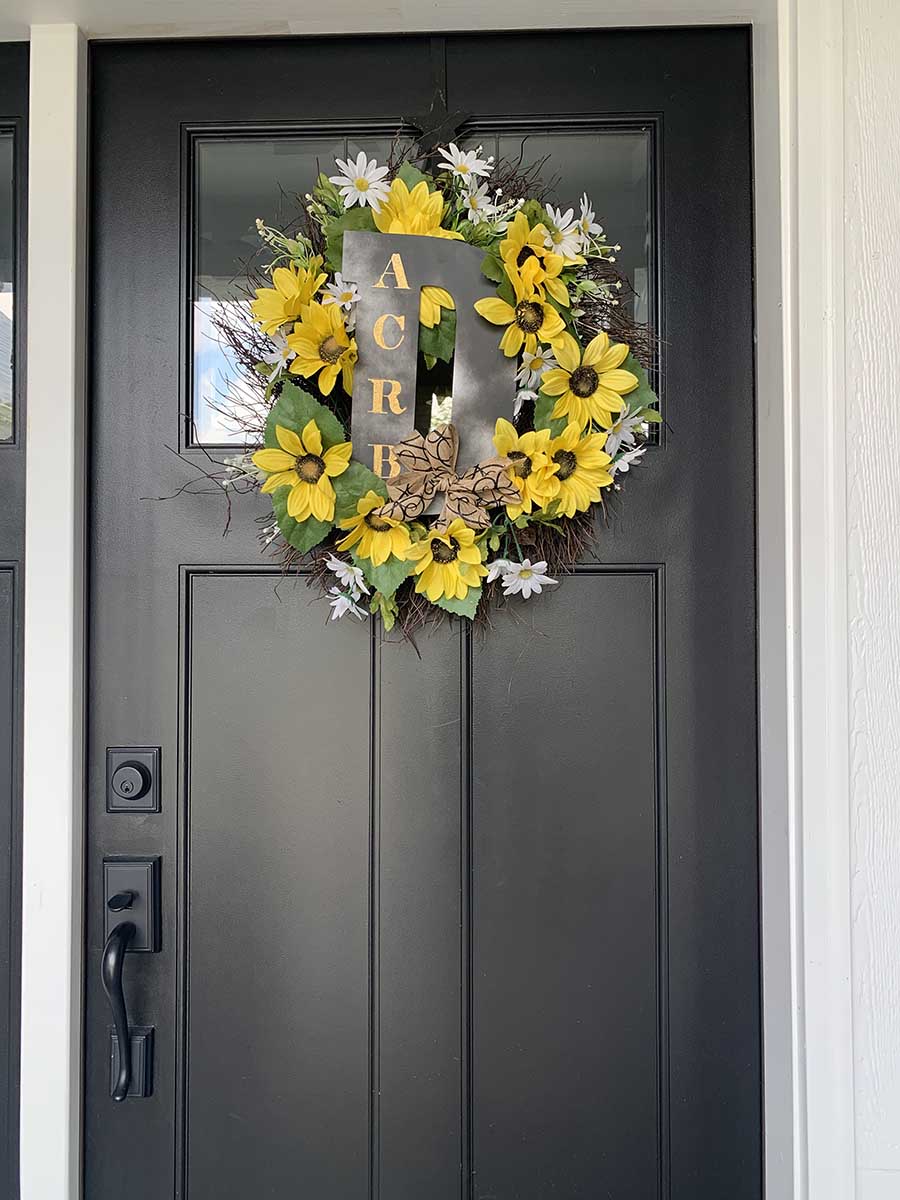
This project is great as a gift for newlyweds, in-laws, or other family members! Give them a way to spruce up their front door and personalize their space with their own initials. They’ll love welcoming guests with this, and these pieces are popular at local craft stores!
Here are the craft materials you’ll want to purchase for this decorative door piece:
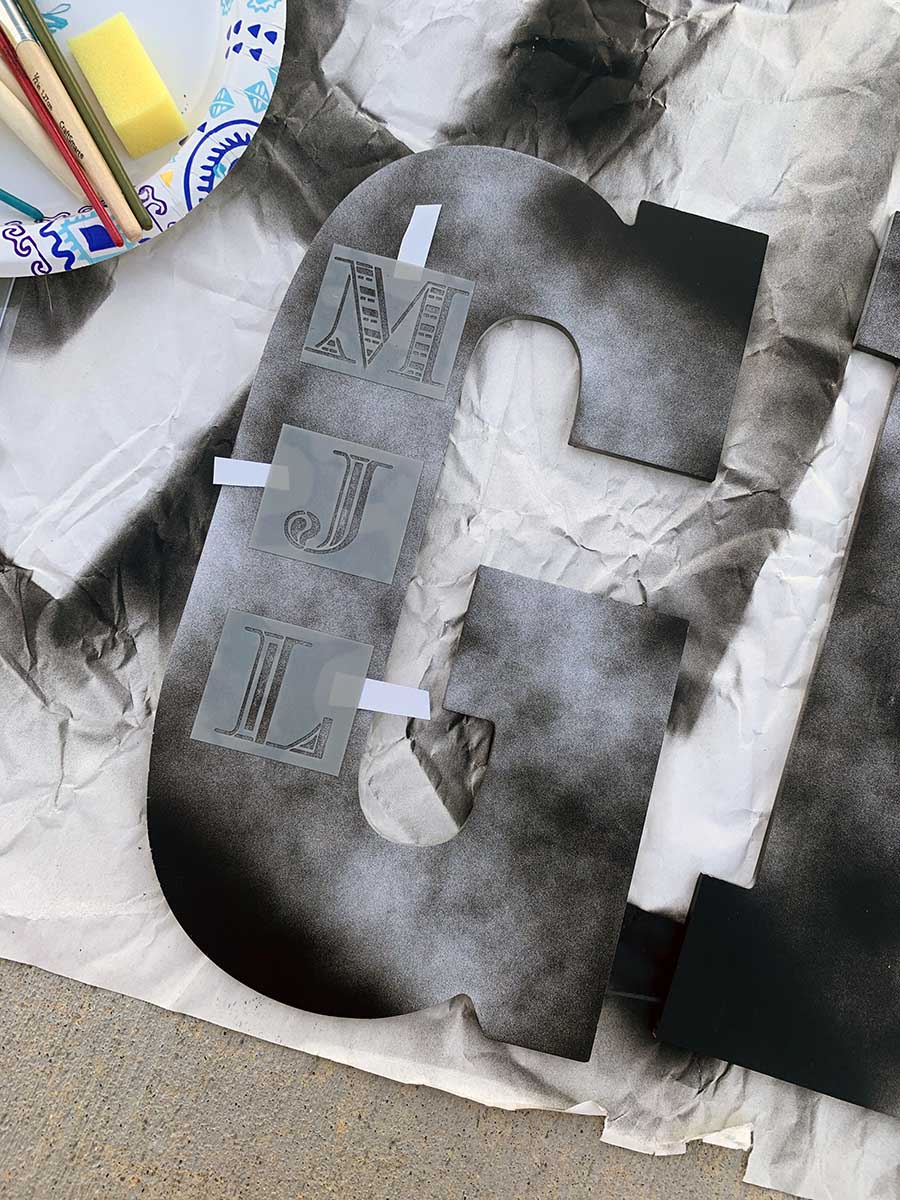
Take your letter and lay it out for spray painting on a sheet or tarp. I completed a splatter image; see below. Let the spray paint dry. Once the letters are dry take your stencils and place them on top of the larger letter. Take your outdoor paint and use the paint brush over the stencil. Remove the stencil and let paint dry. After everything is dry you can finish it off with a fabulous bow.
The best space to place this adorable DIY project could be on your porch, in front of a wreath on the front door, or even on your back porch to spruce up your backyard!
Centerpieces don’t have to be expensive to be elaborate. Take inspiration from Pinterest or professional decorators and then use this DIY wine bottle centerpiece to save big!
This DIY centerpiece requires:
This simple DIY interior design blog project would look perfect on your countertop or dining table as a centerpiece or décor feature for your in-home bar. Instead of throwing away or recycling your old wine bottle, repurpose it!
Take your wine bottle and run it through hot water and soap so you get any of the leftover residue out. Once the bottle is dry take your stencil and put it on the bottle in a desired place. Paint over your stencil and then remove for it to dry. I used this fun “Home Sweet Home” saying stencil I found at Michaels, but you can surely use whatever stencil fits your taste. Once the paint is dry you can string your lights through the bottle.
Now, all that you have remaining to do is to turn your bottle lights on and put it out for all to see! How cute does this look on your dining room table!
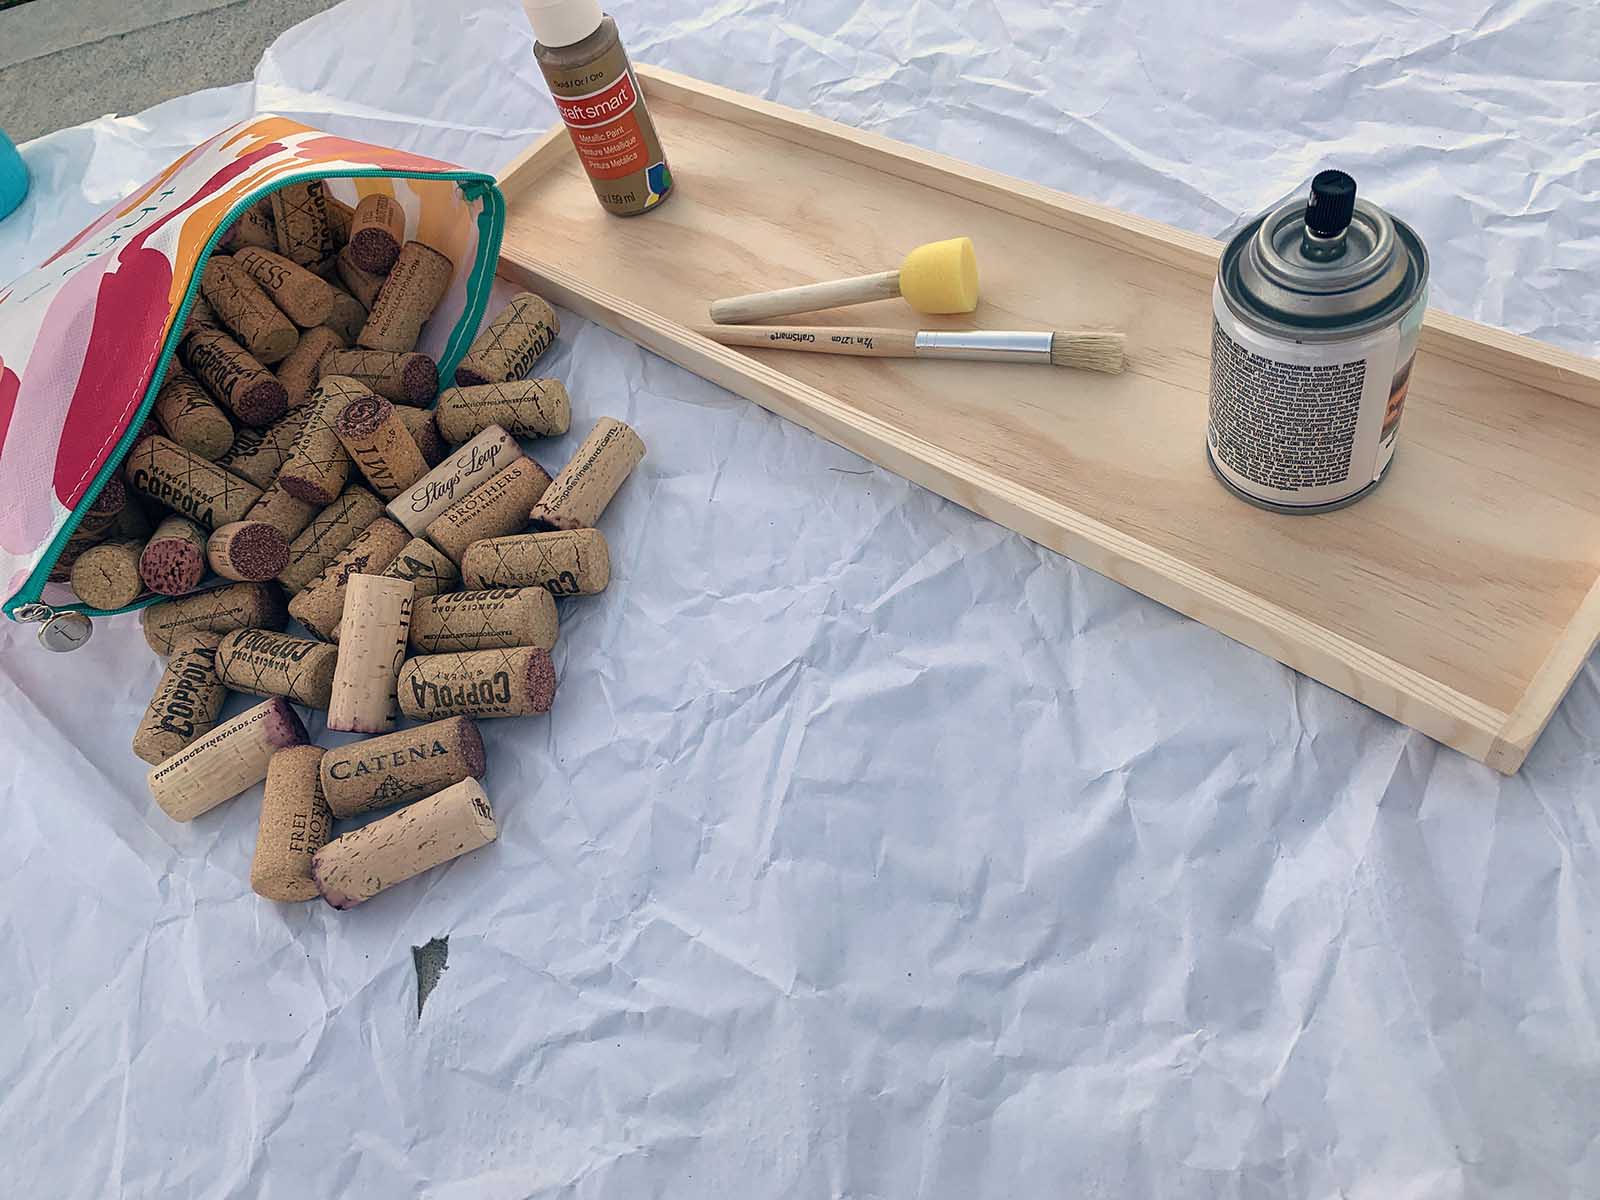
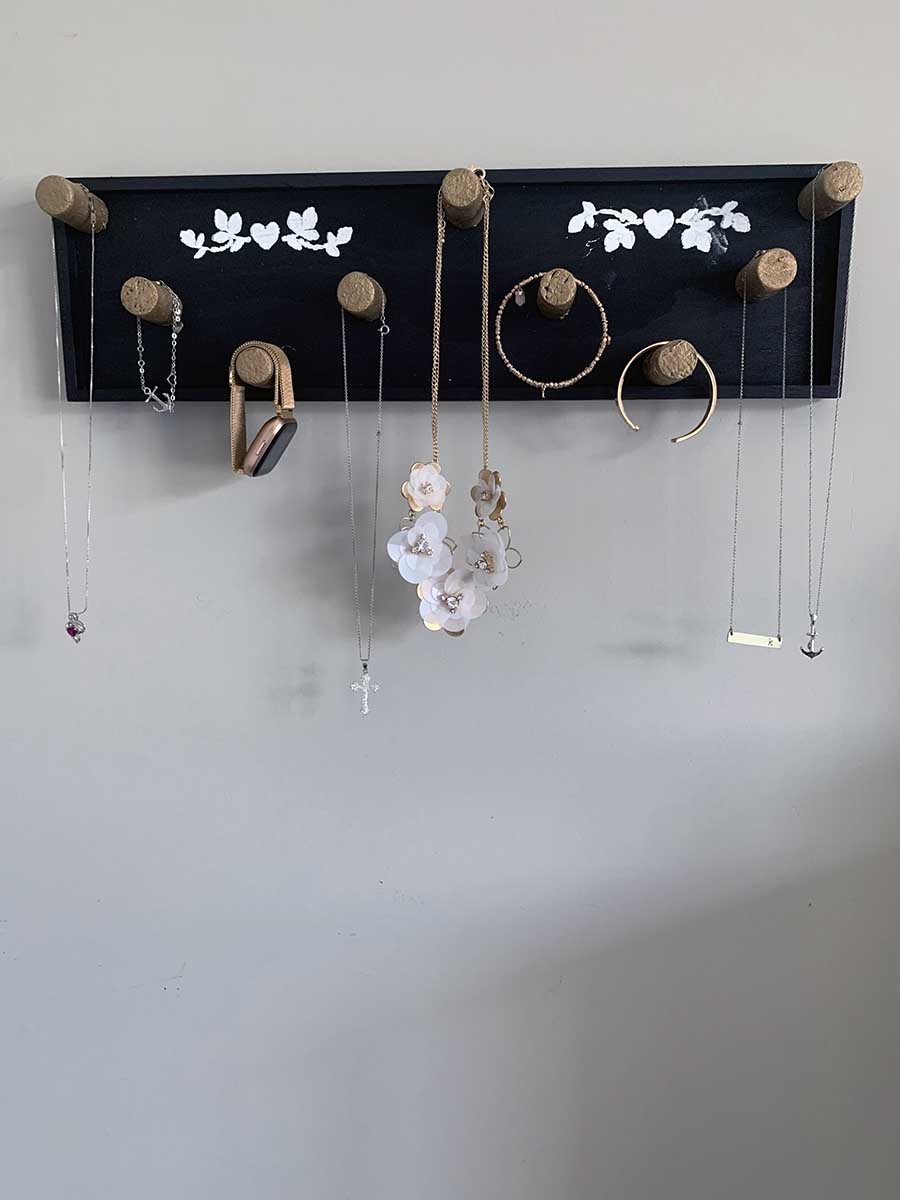
Were you wondering what to do with the corks from those wine bottles in our last DIY project? Well, here you go!
This fun craft calls for:
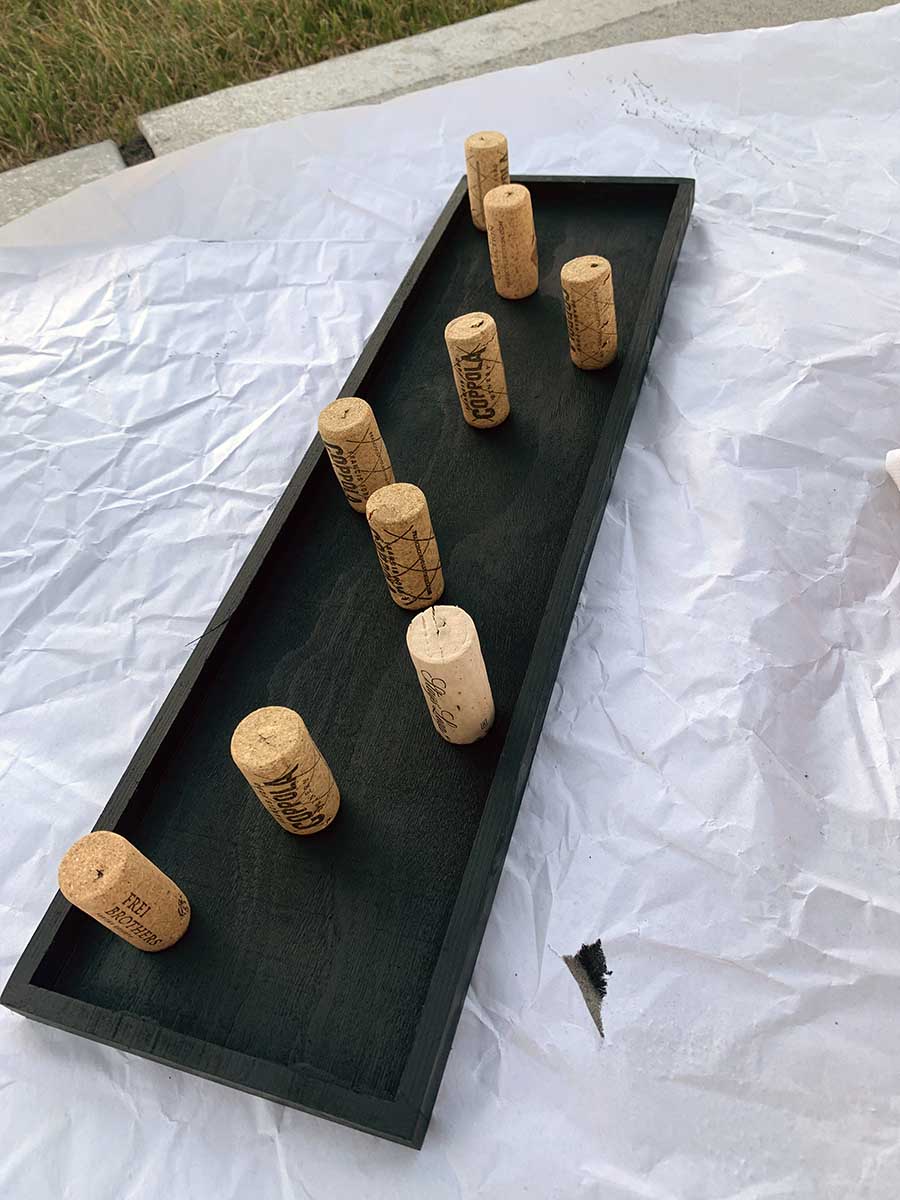
For our next DIY decorating blog project, this wine cork necklace holder is super easy and fun—not to mention perfect for organizing jewelry. Start off by taking your wood board and spray paint it in the color you desire. For my project I used black. Once the board dries, place your wine corks in the position you would like your jewelry to hang. I have done mine in a “W” formation. Make sure that all the corks are spaced out so you don’t have and overlapping. This helps keep your jewelry from getting tangled.
Once you have your corks in the formation you want them in it is time to paint. I set mine out on a piece of paper then proceed to spray paint them in gold!
Once your corks have finished the drying process you are ready to start gluing! I found that Gorilla Glue® holds better, especially if you have heavier necklaces. Proceed to gluing your corks down. Let them dry. If you want to add finishing touches such as putting initials on your creation, just simply take a stencil and paint or even do splatters of to gold spray paint as seen below.
Want even more ideas for wine corks? Check out this easy-to-use guide.
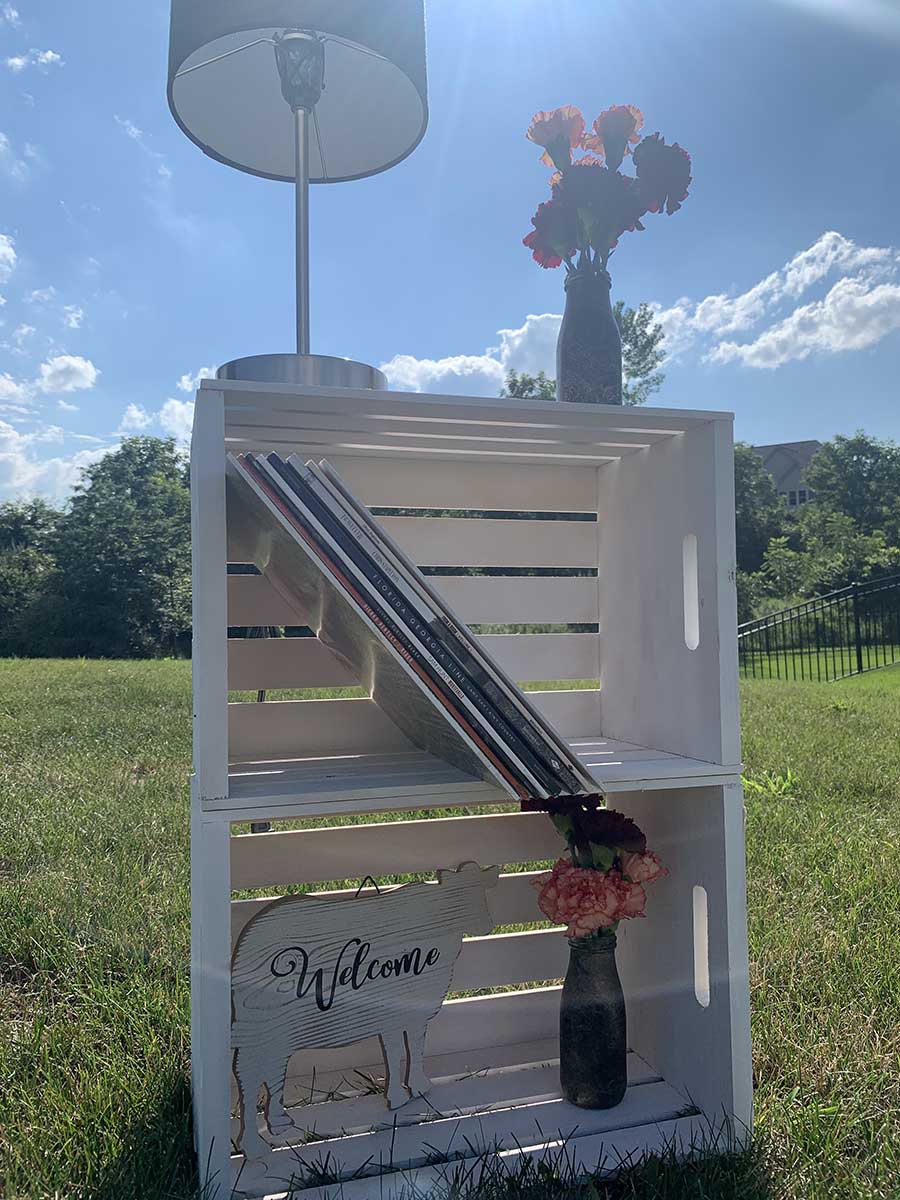
This side table is great for a bedroom or small space. It not only looks great alongside of your other chic design pieces, but it also keeps books, pictures, and keepsakes in a safe place!
For this easy DIY project, your materials are:
Grab two crates from your local grocery or craft store and put them together however you would like. I put mine in a horizontal position stacked on one other. Proceed to spray paint the crates in any color that matches what you are going for! I recommend putting more than one coat.
After the paint is dry, I went over the inside with a gold marbling spray paint to give the color texture; however, you do not need to do this. Once you are completed with the color, go over the crates again with a clear finish to add the last touches, making the finish look perfect. I finished my crates with a matte finish, but you can also do a glossy finish if that is better for your lifestyle.
Once this is complete take five screws and place one screw in all four corners and the fifth one in the center. After that is complete stage your side table with whatever décor you would like. I put records, two follower vases, a welcome sign, and a lamp on mine!
From new ways to perk up an entryway to wowing guests with a stunning centerpiece at the dinner table, these easy projects are affordable to assemble. Get your paint clothes on, grab a craft buddy, and find even more DIY and decorating blog features to make at home!
What Is Private Mortgage Insurance (PMI) and How Does It Work?
10 Steps to Buying Your First Home
By browsing, you accept our terms of use and privacy policy.


